
Hello everyone,
i have been asked to create a little intro to the project PSGUI.
So in this post i want to show you step by step how you can work with PSGUI and get it to work.
Download and Install via PowershellGallery

Herefore you just need Powershell v5 / WMF5.
The commands are as follow:
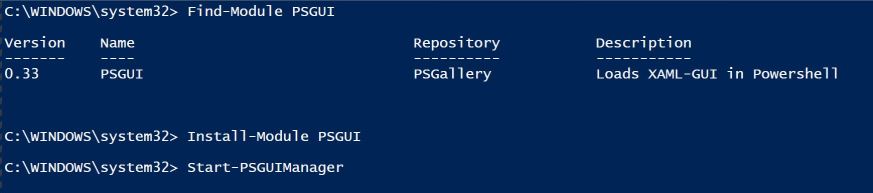
If this installation worked for you scroll down to the topic “PSGUIManager”
Alternatively via Git
Download
First of all you have to download the project files. This can be found in my Git repository which includes also the most recent updates:
https://github.com/ddneves/PSGUI/
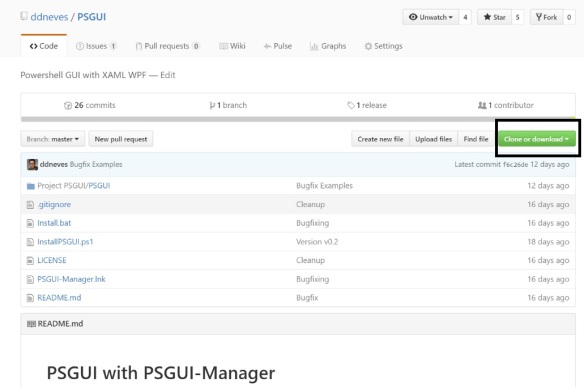
If you are familiar with Git you can clone this repository locally to automatically receive the recent updates. Otherwise just download the recent version as ZIP-file.
Now go to your Download-Path and unblock the downloaded content as seen below.

Afterwards just extract the zip-file to to a equally named folder.
Installation
After opening this folder you will find this folder structure.
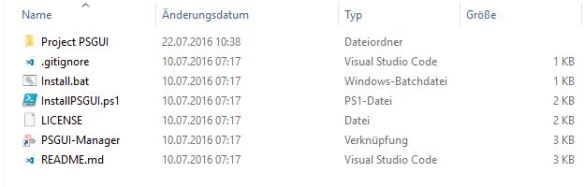
Her you can just double-click on the file “install.bat” which will look like this:

Now the PSGUI module as also the integtrated PSGUIManager have been installed and a shortcut has been placed on your desktop for the PSGUIManager:
PSGUIManager
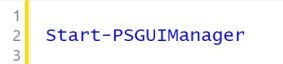
You can either use this shortcut or the Powershell-Command “Start-PSGUIManager” to start the PSGUI-Manager.
After showing up a splash screen

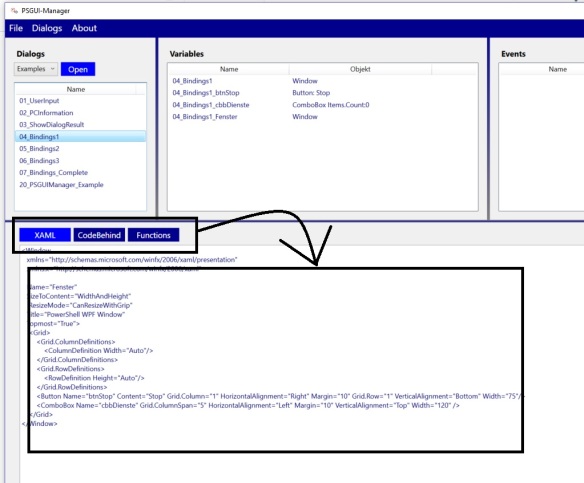
the PSGUIManager will be opened and look something like this:

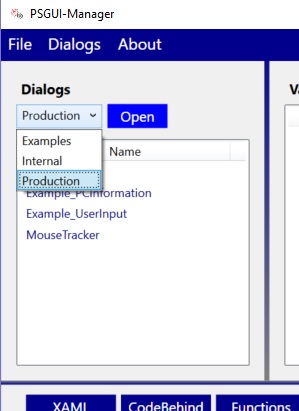
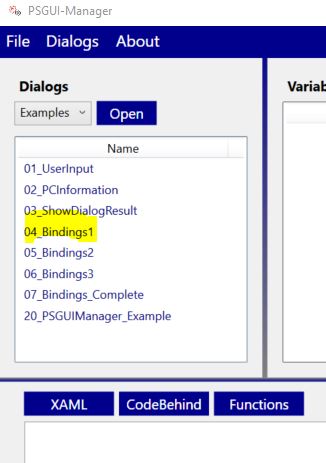
In the top left you see the Dialogs. I have created a big bunch of examples to show how PSGUI can be used and also what is possible with XAML-GUIs and how it can be achieved. Therefore it is also a good way to learn the techniques by taking a look at each example.
At the full top you see the menu, which will be filled with more functions in the next months.
GUI structure
One dialog consists of 3 files, which are stored in one folder with equal folder and file names. This structure can also be found in the PSGUIManager:
I did this to structure the code and getting it more manageable. Nothing is more ungrateful than searching everything in only one file, where you have stored everything.

The XAML-file is – what it is. A XAML window created by using the Extensible Application Markup Language with its controls.
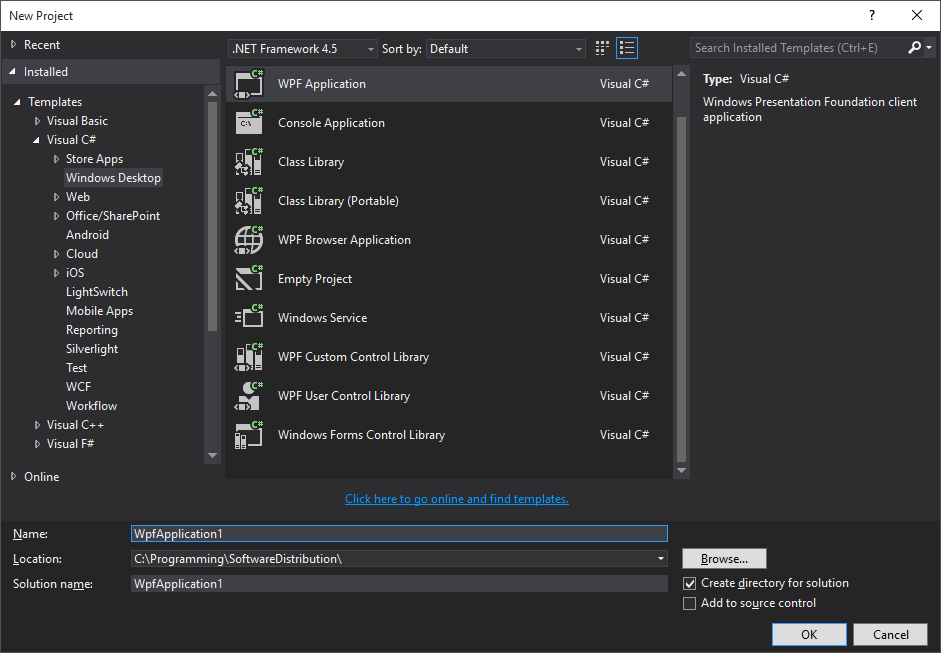
Edit the XAML-File with VS Community
I would suggest you to use Visual Studio Community herefore. It is the best designer on the market in my opinion.
Create a new web application, add a new window and create an user interface with Visual Studio as you would normally do.
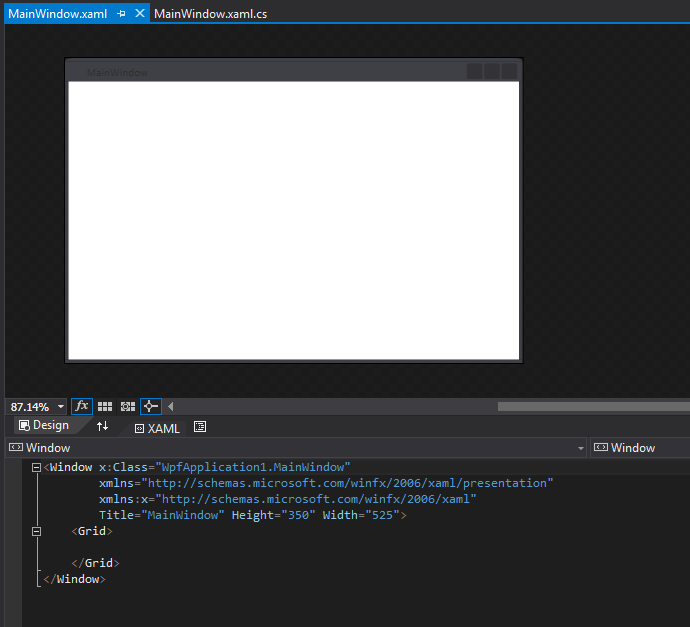
If you do not have any skills at building a GUI with WPF then it is the perfect time to achieve these. Later on i will show some examples and how the GUI works with the CodeBehind firstly targetted to beginners. But you should also read some basics by yourself.
One important point here – give all your objects which you want to use actively – a name and those to which no interaction is done – not.
Example: So you would give your textbox a name like x:Name=”tbWonderfulTextbox” but your label which shows the whole time “Wonderful Textbox” not. By this you save resources and it will keep things simple later on.
CodeBehind
The CodeBehind file contains all the events:
<# .NOTES =========================================================================== Created on: 08.10.2015 Created by: David das Neves Version: 0.1 Project: GUI_Manager Filename: GUI_Manager.ps1 =========================================================================== .DESCRIPTION Code-Behind for GUI-Manager. #&gt;
#===========================================================================
#region functions
#endregion
#===========================================================================
#===========================================================================
#region PreFilling
$GUI_Manager.Add_Loaded(
{
Get-ChildItem $GUI_Manager_DialogFolder -Directory | % {
$param=[PSCustomObject]@{
Name = $_.Name
}
$GUI_Manager_lvDialogs.Items.Add($param) | Out-Null
$GUI_Manager.Activate()
}
}
)
I have set up some rules as mentioned before. And here these rules continue. For each object in XAML a variable in Powershell is created. But how do you manage so many variables in Powershell?
The window-variable gets the name of the dialog. In this example (btw this is the “exemplary” GUI-Manager!) the dialog is named “GUI_Manager”.
By adding this event
$GUI_Manager.Add_Loaded(
        {
          #some stuff
        }
)
the part for #some stuff is proceeded when the window is loaded. This is the perfect time to initialize all your GUI-objects. Putting list items into lists, filling textboxes – setting up the starting view for the user.
And now comes the fun part – but what is with the objects in the XAML file?
The objects will be named like this pattern – just straightforward:
DialogName_objectNameInXAML
Try to find the variables here:
        $GUI_Manager_lvDialogs.Add_SelectionChanged(
            {
                if ($GUI_Manager_lvDialogs.SelectedValue)
                {
                    foreach ($item in $GUI_Manager_lvDialogs.Items.Name)
                    {
                        if ($GUI_Manager_lvDialogs.SelectedValue.Name -ne $item)
                        {
                            Get-Variable -Name "$item*" | Clear-Variable -Scope Global
                            Get-Variable -Name "$item*" | Remove-Variable -Scope Global
                        }
                    }
                    $dialogName=$GUI_Manager_lvDialogs.SelectedValue.Name
                    $GUI_Manager_rXAML.IsChecked=$false
                    $GUI_Manager_rXAML.IsChecked=$true

                    Initialize-XAMLDialog -XAMLPath "$GUI_Manager_DialogFolder\$dialogName\$dialogName.xaml"
                    #Open-XAMLDialog -DialogName "$dialogName" -DialogPath "$GUI_Manager_DialogFolder\$dialogName" -OnlyCreateVariables
                    $GUI_Manager_lvVariables.Items.Clear()
                    $GUI_Manager_lvEvents.Items.Clear()

                    $variables = Get-Variable "$dialogName*"

                    foreach ($var in $variables)
                    {
                        if ($var -and $var.Name -and $var.Value)
                        {
                            $varValue=(($var.Value.ToString()).Replace('System.Windows.','')).Replace('Controls.','')

                            $param=[PSCustomObject]@{
                                Name =    "$($var.Name)"
                                Objekt =  "$varvalue"
                            }

                            $GUI_Manager_lvVariables.Items.Add($param)
                        }
                    }
                }
            }
        )
The nice thing about this is that you can create these variables with the function “Open-XAMLDialog” and the switch flag $OnlyCreateVariables in powershell with one click and afterwards you have intellisense for these objects. Getting things lot easier!
Additional functions
At last i have added a file ended on .psm1 which should contain additional functions or even act as a loader for outsourced code. For example:
<# .NOTES =========================================================================== Created on: 11.10.2015 Created by: David das Neves Version: 0.1 Project: PSGUI Filename: loader.psm1 =========================================================================== .DESCRIPTION Loading functions for PSGUI module. #&gt; . $PSScriptRoot\Initialize-XAMLDialog.ps1 . $PSScriptRoot\New-XAMLDialog.ps1 . $PSScriptRoot\Rename-XAMLDialog.ps1 . $PSScriptRoot\Open-XAMLDialog.ps1 . $PSScriptRoot\Install-PSGUIModule.ps1 . $PSScriptRoot\New-PackageByDialog.ps1
Take a look at the examples
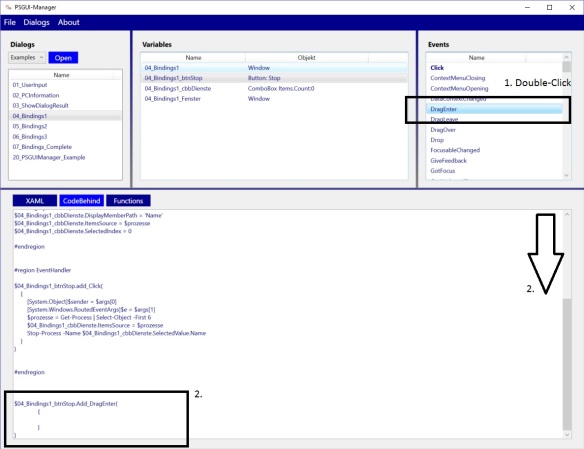
To take look at the examples just select the dialogs you want to see.

Afterwards you can select any of the variables and the event-listview for this selected object is filled.
As you can also see, the click event of the object btnStop is shown in bold in the event-listview. This means that this event is just present in the CodeBehind-File. To jump to the event in the file just double-click it. To create a new event just double-click on any event, which is not shown in bold and it will be created automatically and also jump to it.
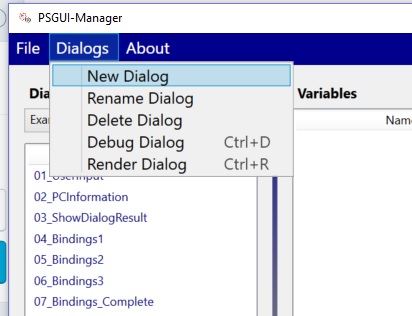
Create your own new dialog
To create you own new dialog you first choose the folder where you want to save it
and create the new dialog with the integrated function in the menu:
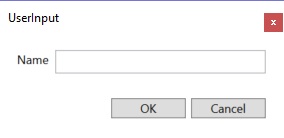
Afterwards the input dialog is shown, where you have to name the new dialog:
The folder structure – the 3 files – are created automatically:

Now you should modify your XAML-files with VS as described above. Copy/Paste your XAML-Content into the PSGUI-Manager and save the file (CTRL+S)
Afterwards the new variables are created:
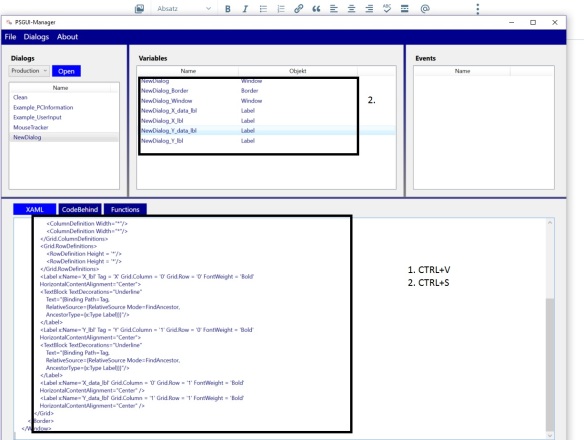
Now press on the objects in the variables listview to which you want to add some events.

and double-click on the events you want to add.
Take a look here for futher information.
Framework PSGUI
Under the hood the “Framework” PSGUI (actually it is a Powershell Module) is working which consists of many functions. Here is the actual list of functions and how you can gather these:

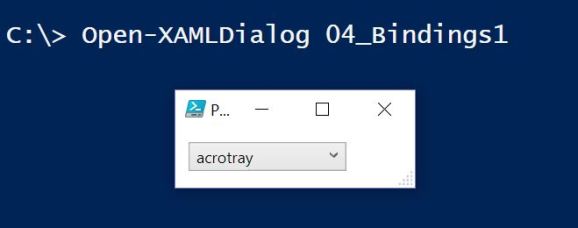
Each function has a help file, which will also be improved in the next time. The most important function here is surely the “Open-XAMLDialog”

Here you can either just enter the dialogname of the dialog you want to show or the dialogpath. By just entering a dialogname the function will search the “known folders”, which are also shown in the PSGUIManager for this dialog and render it. For example:
The other possible way is to open the dialogpath.
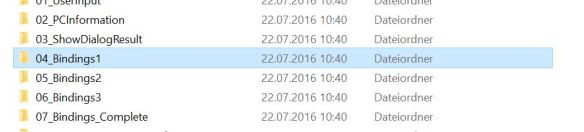

The folder itself must contain 3 files as shown in all examples and explained above in the topic of the PSGUIManager:

And thats it – a picturerich introduction to the PSGUIManager and the Module PSGUI. I hope that it has been very helpful to start your first GUIs.
If there is anything still unclear please let me know.
Happy GUI-ing!
Best regards,
David
